React, Next를 이용한 개인블로그는 어떻게 만들까
tstory, 네이버블로그, velog 등을 이용하지 않고 최근에 진행했던 프로젝트의 환경을 기반으로하여 블로그를 만들고 싶었어요. CS 지식이 많이 부족한 스스로에게 공부를 메모할 수 있는 나만의 공간을 만들어보고 기능들을 사용하여 블로그를 만들어봅시다.
블로그 프로젝트 환경
처음에는 백, 프론트 구분하여 개발을 하려고 했지만 시간과 비용이 소모되며 마크다운을 이용한 gray-matter 라이브러리를 이용해 블로그를 구축할 수 있다는 것을 알게되었습니다. 이를 기준으로 React, Next는 기본으로 이에 따른 상태관리를 위한 Redux, 스타일링은 sass 방식을 사용하기로 했어요.



개발단계
1. 공통 레이아웃, 메인페이지 구성
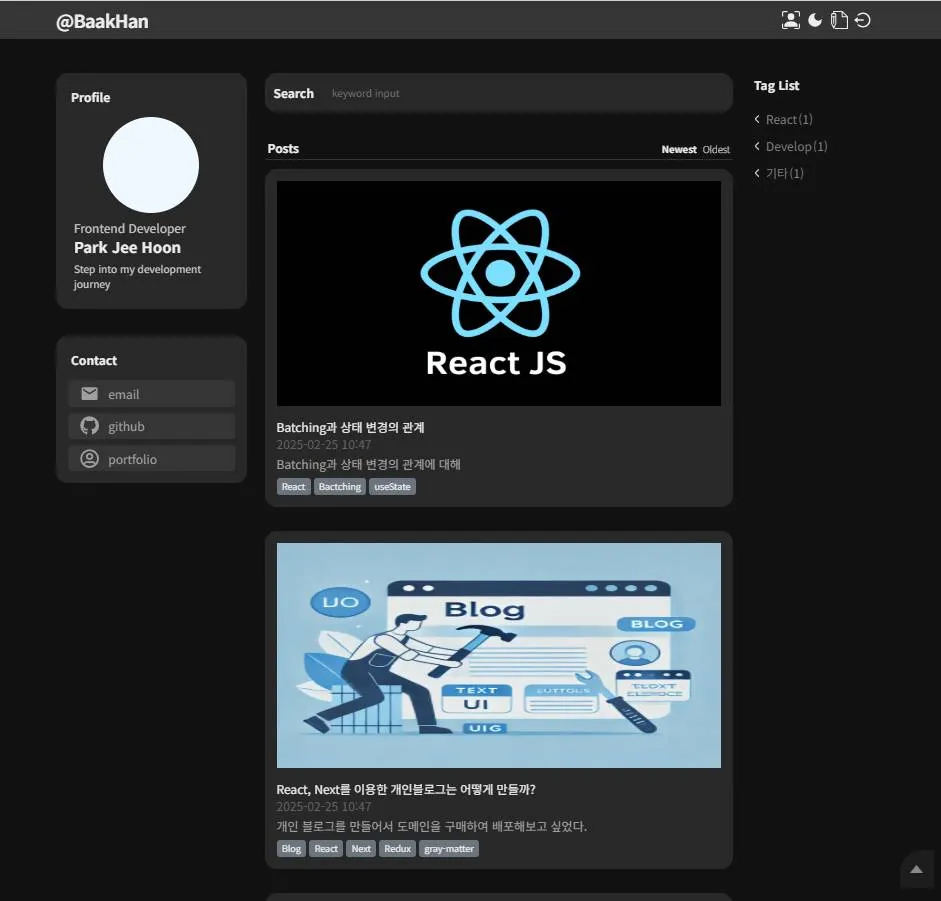
블로그의 첫 인상이되는 메인페이지를 보여준다고 했을 때 깔끔한 디자인을 보여주고 싶어 고민을 많이 했어요. 기본적인 헤더와 푸터 중앙 영역에는 게시글 목록을 보여주고 목록을 기준으로 양 옆에 사이드 바 메뉴를 구성하면 좋겠다고 생각해 지금과 같은 메인페이지의 UI 구성이 되었죠
2. 마크다운
gray-matter 라는 라이브러리를 통해 마크다운 파일을 읽어올 수 있도록 하였어요. 메인페이지에서 보여줄 전체 게시글 목록인 getMarkdownAllPosts.ts 파일과 게시글 상세페이지에서 보여줄 특정 게시글 목록인 getMarkdownPost.ts 파일을 각각 생성하였고 fs.readFile 을 통해 파일을 읽어 gray-matter로 데이터를 분리하였어요 아래의 코드의 data와 content를 분리하자면 마크다운 파일의 --- 삼중 대시로 감싸 진 영역(Front Matter)이 'data'고 그 외의 본문 내용은 'content'에요 즉 Front Matter 영역 내에 메인페이지, 상세페이지에 보여줄 데이터 내용을 완성하는거죠
1const getMarkdownAllPosts = async () => {
2    const fileNames = fs.readdirSync(postsDirectory);
3
4    const postList = fileNames.map((fileName) => {
5        const fullPath = path.join(postsDirectory, fileName);
6        const contents = fs.readFileSync(fullPath, 'utf8');
7
8        /// data === FrontMater, content === 본문
9        const { data, content } = matter(contents);
10
11        const post: PostType = {
12            slug: convertToSlug(data.title),
13            title: data.title,
14            description: data.description,
15            thumbnailImage: data.thumbnailImage,
16            mainTag: data.mainTag,
17            regDate: data.regDate,
18            tags: data.tags,
19            content,
20        };
21
22        /// 게시글 상세 페이지일 경우 아래 코드 추가
23        // if(convertSlug === slug) {
24        //     return post;
25        // }
26
27        return post;
28    }).sort(
29        (a, b) => new Date(b.regDate).getTime() - new Date(a.regDate).getTime(),
30    );
31
32    return {
33        postList: postList,
34    };
35};
3. 상세 페이지
마크다운 파일을 통해서 데이터를 가져오는 방법을 확인했으면 이러한 데이터를 이용하여 화면에 출력하는 방법을 알아보죠. 마크다운 형식의 데이터를 화면에 출력하기 위해 아래와 같은 라이브러리를 사용해볼게요
1. react-markdown
- React 환경에서 마크다운을 렌더링 할 수 있도록 도와줍니다.
- 마크다운 문법을 HTML로 변환하여 출력해줍니다.
2. rehype-raw
- 기본적으로 react-markdown 와 함께 사용되며 HTML 태그를 파싱하여 적용할 수 있도록 해줍니다.
3. remark-breaks
- 마크다운에서 줄바꿈(
)을 <br> 태그로 변환해주는 플러그인이에요 즉 줄바꿈을 강제로 적용시켜 줍니다.
4. remark-gfm
- GFM을 지원하는 플러그인으로 체크박스 리스트, 표, 스트라이크스루(취소선) 같은 GitHub에서 사용하는 확장된 마크다운 문법을 적용할 수 있도록 해줍니다.
5. react-syntax-highlighter
- 코드 블록의 구문 강조를 지원하는 라이브러리입니다. (```js  {코드}  ```)
적용에 앞서 react-markdown의 Import에 관련이에요. react-markdown을 직접적으로 import 하게되면 Hydration failed 에러가 발생할 수 있어요 그러면 가장 먼저 Hydration failed는 무엇일까요?
1. Hydration failed 에러란?
- Next.js에서는 서버에서 미리 렌더링한 HTML과 클라이언트에서 실행되는 React 컴포넌트의 결과가 일치하지 않으면 Hydration failed 오류가 발생해요. 즉, 서버에서 렌더링한 마크다운과 클라이언트에서 렌더링한 마크다운이 다르면 에러가 뜨는 거죠.
서버와 클라이언트의 마크다운이 다르게 해석될 가능성이 충분이 있으며 저는 이러한 에러로인해 Dynamic Import로 클라이언트에서만 실행되도록 설정하였어요.
1const DynamicReactMarkdown = dynamic(() => import('react-markdown'), {
2	ssr: false,
3});
Next.js에서 react-markdown을 직접 사용하면 서버와 클라이언트의 렌더링 결과 불일치로 Hydration failed 에러가 발생할 수 있어요.
이를 방지하기 위해 dynamic(import("react-markdown"), { ssr: false })를 사용하면, 클라이언트에서만 렌더링되도록 강제하여 오류를 해결할 수 있어요. 그러면 Dynamic으로 import한 react-markdown을 사용해보죠.
1<DynamicReactMarkdown
2	remarkPlugins={[remarkGfm, remarkBreaks]}
3	rehypePlugins={[rehypeRaw]}
4	components={{
5		code(props) {
6			return customCodeBlock({ props, theme });
7		},
8		h1: ({ children, ...props }) => {
9			return (
10				<h1
11					id={generateHeadingId(String(children))}
12					style={{ fontSize: '2em' }}
13					{...props}
14				>
15					{children}
16				</h1>
17			);
18		},
19		h2: ({ children, ...props }) => {
20			return (
21				<h2
22					id={generateHeadingId(String(children))}
23					style={{ fontSize: '1.75em' }}
24					{...props}
25				>
26					{children}
27				</h2>
28			);
29		},
30		h3: ({ children, ...props }) => {
31			return (
32				<h3
33					id={generateHeadingId(String(children))}
34					style={{ fontSize: '1.5em' }}
35					{...props}
36				>
37					{children}
38				</h3>
39			);
40		},
41		h4: ({ ...props }) => <h4 style={{ fontSize: '1.25em' }} {...props} />,
42		h5: ({ ...props }) => <h5 style={{ fontSize: '1em' }} {...props} />,
43		p: ({ ...props }) => (
44			<p style={{ marginTop: '0', marginBottom: '1rem' }} {...props} />
45		),
46		pre: ({ ...props }) => (
47			<pre style={{ marginTop: '0', marginBottom: '1rem' }} {...props} />
48		),
49		details: ({ ...props }) => (
50			<details style={{ cursor: 'pointer' }} {...props} />
51		),
52	}}
53>
54	{markDownContent}
55</DynamicReactMarkdown>
install 받은 rehype-raw, remark-breaks, remark-gfm 세개의 라이브러리는 위 코드처럼 적용시켜줄 수 있어요.
react-markdown의 장점으로는 내가 원하는 태그 영역을 커스텀하여 스타일링 할 수 있다는 것이 장점이죠. react-syntax-highlighter를 사용하기 위해서는 components 객체의 code 속성에 적용시켜줘야 해요
1import { Prism as SyntaxHighlighter } from "react-syntax-highlighter";
2
3const customCodeBlock = ({ props, theme }: CustomMarkdownType) => {
4    const { className, children } = props;
5    const match = /language-(\w+)/.exec(className || '');
6
7    if (match?.[1] === "javascript" || match?.[1] === "js" || match?.[1] === "ts") {
8        return (
9            <SyntaxHighlighter
10                className={styles.scriptBlock}
11                style={theme === 'dark' ? materialDark : coy}
12                language="javascript"
13                PreTag="div"
14                showLineNumbers
15                wrapLines
16            >
17                {String(children).replace(/
18$/, '')}
19            </SyntaxHighlighter>
20        );
21    }
22    return (
23        <div className={styles.codeBlock}>
24            <code {...props}>{children}</code>
25        </div>
26    );
27};
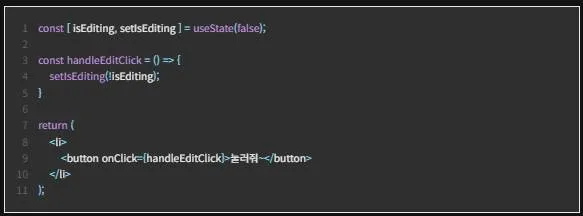
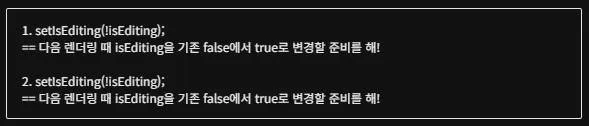
react-markdown과 같은 라이브러리는 코드 블록을 렌더링할 때 보통 다음과 같이 code 태그에 className을 추가해요. code 태그 영역으로 들어오는 props 중 className을 통해서 match를 구분하고 각 match마다 원하는 style을 적용시킬 수도 있어요. 저는 코드블록을 두가지로 구분을 했어요 JavaScript("javascript", "js") 또는 TypeScript("ts") 코드 블록이면 react-syntax-highlighter의 SyntaxHighlighter를 사용해 코드 블록을 하이라이팅 하였고 그 외는 모두 일반 code 태그로 출력하여 원하는 코드블럭을 만들었죠. showLineNumbers, wrapLines은 코드블록 좌측에 line number를 생성해주어 같이 추가해 주었어요.
-
하이라이팅 코드블록
-
그 외 코드블록
작성한 마크다운의 내용으로 목차도 자동생성이 되면 좋겠다 라는 마음이 있어 추가로 개발을 해봤어요. 목차의 기준을 마크다운의 헤딩을(#, ##, ###)을 통해 만들어 볼게요. content로 들어오는 마크다운 본문에서 헤딩을 모두 조회하여 각 헤딩별 level과 내용을 위한 text 클릭했을 때 해당 위치로 바로 가기 위한 id 값을 주었어요.
1//PostContent.hook.ts
2export const usePostContent = ({
3    content
4}: PostContentParams) => {
5    const getPostContentHeadings = useCallback(() => {
6        const headingMatches = content.match(/^#{1,3} .+/gm) || [];
7
8        return headingMatches.map((heading) => {
9            const level = heading.match(/^#{1,3}/)?.[0].length || 0;
10            const text = heading.replace(/^#{1,3} /, "");
11            const id = text.replace(/\s+/g, "-").toLowerCase();
12
13            return { level, text, id };
14        });
15    }, [content]);
16
17    return {
18        getPostContentHeadings
19    };
20};
이렇게 가지고 온 데이터를 이용해 이처럼 목차를 만들 수 있죠
4. 게시글 등록
블로그에 게시글을 생성할 때 마크다운 파일을 생성하고 커밋, 푸쉬, 풀리퀘, 디플로이 이러한 과정이 매번 있는 것은 번거롭다고 느껴져 홈페이지 관리자만 게시글 등록을 할 수 있는 페이지를 만들어 봤어요.
/admin에 접근했을 때 next-auth를 통해 깃허브 로그인을 할 수 있게끔 했고 로그인한 계정의 정보와 버셀에 등록한 secret 값이 일치할 시 헤더에 '게시글 작성 페이지'로 이동하는 버튼을 놓고 해당 페이지로 접근시 유효성 체크를 하였죠.
1// admin/index.tsx
2import { signIn } from "next-auth/react";
3import { useEffect } from "react";
4
5export default function AdminRedirect() {
6    useEffect(() => {
7        signIn("github", { callbackUrl: "/" });
8    }, []);
9
10    return <p>Loding...</p>;
11}
12
13// write/index.tsx
14import { useRouter } from 'next/router';
15import { useSession } from 'next-auth/react';
16import { useEffect, useState, useCallback } from 'react';
17import { Write } from '@/components/pages/Write';
18
19const WritePage: React.FC = () => {
20    const [notFound, setNotFound] = useState(false);
21    const { isReady } = useRouter();
22    const { data: session, status } = useSession();
23
24    const load = useCallback(async () => {
25        setNotFound(false);
26        const authenticate =
27            !!(ACCESS 데이터 === process.env.NEXT_PUBLIC_GITHUB_ACCESS && status === "authenticated");
28
29        if(!authenticate) {
30            setNotFound(true);
31        }
32    }, [session, status]);
33
34    useEffect(() => {
35        if (isReady) {
36			load();
37		}
38    }, [isReady, load]);
39
40~~~~~~
게시글을 작성할 때는 현재 작성하고 있는 마크다운 내용들이 제가 커스텀한 마크다운 디자인으로 실시간 확인이 되길 원했어서 textarea에 onChange 이벤트와 useState set을 적용시켰죠 해당 데이터를 통해 상세 페이지에서 작성한 코드를 응용하면 이처럼 작성페이지와 미리보기를 만들 수 있어요.
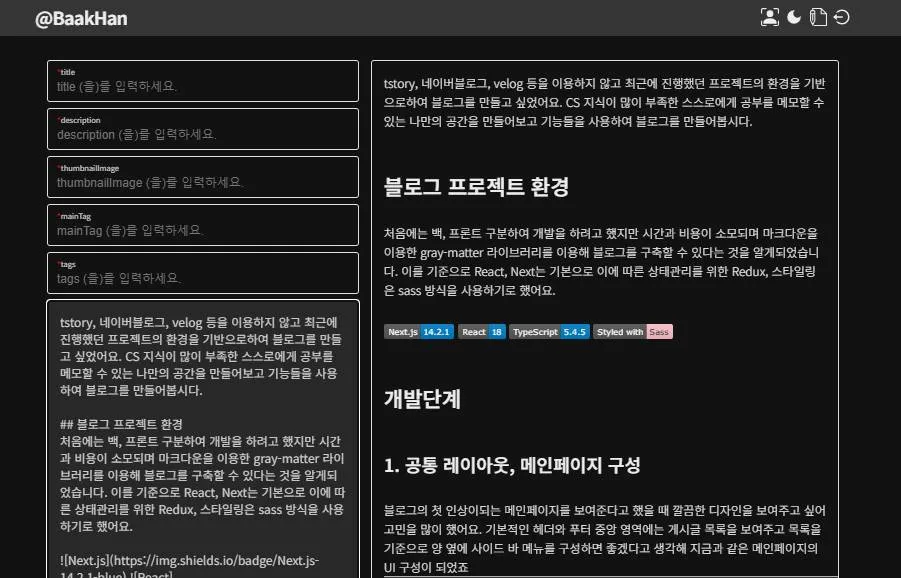
그러면 완성된 게시글을 등록해보죠.
onClick 이벤트를 통해 작성한 게시글이 GitHub의 main 브랜치에 업로드되며, Vercel에서 자동으로 배포될 수 있도록 설정했어요. GitHub의 Settings → Developer settings에서 OAuth를 생성하고, 발급된 OAuth 토큰을 활용해 블로그 레포지토리와 연결했어요. 이후, useState로 관리하는 post 데이터를 기반으로 Front Matter를 생성하고, 커밋 메시지, GitHub API URL, 마크다운 파일 경로 등을 설정하여 업로드할 수 있도록 구현했어요.
1import { format, parseISO } from "date-fns";
2import { PostType } from "@/models/pages/slug";
3
4export const uploadToGitHub = async (post: PostType) => {
5    const repo = process.env.NEXT_PUBLIC_GITHUB_REPO!;
6    const branch = process.env.NEXT_PUBLIC_GITHUB_BRANCH!;
7    const token = process.env.NEXT_PUBLIC_GITHUB_ACCESS_TOKEN!;
8
9    const filePath = `frontend/src/posts/${post.title}.md`;
10    const commitMessage = `docs: ${post.title} 게시글 작성`;
11
12    // GitHub API URL
13    const url = `https://api.github.com/repos/${repo}/contents/${filePath}`;
14
15    const frontMatter = [
16        "---",
17        `title: "${post.title}"`,
18        `regDate: "${format(parseISO(post.regDate), "yyyy-MM-dd HH:mm")}"`,
19        `description: '${post.description}'`,
20        `thumbnailImage: '${post.thumbnailImage}'`,
21        `mainTag: '${post.mainTag}'`,
22        `tags: ${JSON.stringify(post.tags)}`,
23        "---",
24    ].join("
25");
26
27    const markdownWithMetadata = `${frontMatter}
28
29${post.content}`;
30
31    // 파일 내용 Base64 인코딩
32    const contentEncoded = Buffer.from(markdownWithMetadata, "utf-8").toString("base64");
33
34    // 기존 파일 체크 (있으면 업데이트)
35    const existingFile = await fetch(url, {
36        headers: { Authorization: `token ${token}` },
37    }).then(res => res.ok ? res.json() : null);
38
39    const requestBody = {
40        message: commitMessage,
41        content: contentEncoded,
42        branch: branch,
43        ...(existingFile && { sha: existingFile.sha }),
44    };
45
46    // GitHub API 요청 (파일 업로드 또는 수정)
47    const response = await fetch(url, {
48        method: "PUT",
49        headers: {
50            Authorization: `token ${token}`,
51            "Content-Type": "application/json",
52        },
53        body: JSON.stringify(requestBody),
54    });
55
56    if (!response.ok) {
57        throw new Error("GitHub 업로드 실패");
58    }
59
60    return response.json();
61};
5. 라이트 모드 & 다크 모드
라이트 모드와 다크 모드 변경은 Redux와 localstorage를 이용하여 개발해 보았어요. 페이지가 처음 로드가 되었을 때 dispatch를 통해 default theme의 값을 dark로 지정한 후 헤더의 있는 버튼을 누를 경우 store 이벤트를 통해 반대의 theme로 업데이트 되도록 구성하였어요
1export const loadLayoutTheme = (dispatch: Dispatch) => {
2    dispatch(actions.updateTheme(getLayoutTheme() || 'dark'));
3};
4
5export function toggleUpdateLayoutTheme(store: AppStore) {
6    return (currentTheme: string) => {
7        const theme = currentTheme === 'light' ? 'dark' : 'light';
8        updateThemeState(store, theme);
9    };
10}
11
12const updateThemeState = (store: AppStore, theme: string) => {
13    store.dispatch(actions.updateTheme(theme));
14    updateLayoutTheme(theme);
15};
이렇게 변경된 theme를 useEffect를 통해 theme가 변경될 시 html 속성값에 넣어놓고
1useEffect(() => {
2	document.documentElement.setAttribute('data-theme', theme);
3}, [theme]);
1@use './dark' as dark;
2@use './light' as light;
3
4html[data-theme="dark"] {
5	--background: #{dark.$backgroundColor};
6	--sub-background-color: #{dark.$subBackgroundColor};
7	--foreground: #{dark.$fontColor};
8	--sub-font-color: #{dark.$subFontColor};
9	~~~
10}
11
12html[data-theme="light"] {
13	--background: #{light.$backgroundColor};
14	--sub-background-color: #{light.$subBackgroundColor};
15	--foreground: #{light.$fontColor};
16	--sub-font-color: #{light.$subFontColor};
17    ~~~~
18}
data-theme가 변경될 때 CSS 변수를 통해서 전역적으로 신고를 하고 다크 모드 및 라이트 모드의 테마를 동적으로 적용할 수 있도록 구성하였어요. 또한 theme가 바뀔 때 자연스러웠으면 좋겠어서 transition 속성을 적용시키기도 하였죠.
6. 추가사항
게시글을 작성할 때 이미지 삽입처리는 아마존의 S3, CloudFront를 이용하여 드래그앤드롭시 S3에 이미지가 업로드되며 화면에 출력될 수 있도록 작업을 하였어요 해당 기능에 관련된 내용은 아래의 블로그에 잘 작성되어 있습니다.
https://www.chanwooyam.dev/series/next-blog/fhE9lkS8xo8aEbKvo6uR
마지막으로
곧 퇴사를 앞두고 있네요.
프로그래머로서 스스로에게 부족한 부분이 무엇인지 명확이 파악이 되었고 CS 지식과 알고리즘이 많이 부족하다는 것을 알게되었어요. 이 블로그를 통해서 부족한 부분을 점차 채워나가는 모습 보여드릴게요.
목차
- 블로그 프로젝트 환경
- 개발단계
- 1. 공통 레이아웃, 메인페이지 구성
- 2. 마크다운
- 3. 상세 페이지
- 4. 게시글 등록
- 5. 라이트 모드 & 다크 모드
- 6. 추가사항
- 마지막으로